Category

blog

Garage Door Spring Replacement Guide

By blog, Service & Repair

Garage door springs may not be the most glamorous part of your home, but they’re the unsung heroes behind the scenes. Ever wondered why your garage door doesn’t come crashing down like an elephant in a tutu every time you open it? Well, it’s the springs! They’re the unsung heroes working tirelessly to keep things balanced and smooth. This guide answers everything you need to know about replacing these crucial components.

Whether you’re a seasoned DIY enthusiast or a curious homeowner seeking insight into what the repairman will do, this guide is your complete resource. So grab a cup of coffee (or tea, we don’t judge) and get comfortable, because we’re diving into the nitty-gritty of garage door springs.

Understanding Garage Door Springs

Before we start, let’s get to know these springs. Garage doors typically use either torsion springs or extension springs. Knowing the type of spring is crucial, as each requires different handling and installation techniques.

Torsion Springs

Torsion springs sit above the door and twist to store energy. Think of them like the coiled spring inside a wind-up toy. They’re more robust and durable than extension springs but can be a tad trickier to replace.

Pros:

  • More robust and longer-lasting.
  • Provide smoother operation.
  • Better for heavier doors.

Cons:

  • More expensive than extension springs.
  • Complex installation process.

Extension Springs

Extension springs are found on the sides of the door and work by extending and contracting. Imagine them as the bungee cords of the garage door world.

Pros:

  • Generally less expensive.
  • Easier to install for DIY enthusiasts.

Cons:

  • Wear out more quickly.
  • Can cause more stress on the garage door.

Signs Your Garage Door Spring Needs Replacement

Just like your favorite pair of jeans, garage door springs don’t last forever. Here are some telltale signs that your springs may be crying for help:

  1. The door won’t open: If your garage door refuses to budge, it might be the springs waving the white flag.
  2. Visible wear and tear: Rust, gaps, or breaks in the spring are clear indicators.
  3. Loud noises: Creaking, popping, or banging sounds are not normal.
  4. Uneven opening: If one side of the door opens higher than the other, you might have a spring problem.
  5. Slow response time: Does your door open slower than molasses? Springs could be the culprit.

Quick Tip:

If your garage door opener is straining or struggling, stop using it immediately. You might risk further damage or injury.

Safety First: Precautions Before Starting

Garage door spring replacement isn’t for the faint of heart. These springs are under immense tension and can cause injury if mishandled. If you’re not comfortable with tools or heights, it’s best to call in the professionals.

Safety Gear

  1. Safety Glasses: Protect your eyes from flying debris.
  2. Gloves: A good pair of work gloves will protect your hands.
  3. Helmet: Consider wearing a helmet if you’re working overhead.
  4. Clothing: Wear close-fitting clothes to avoid getting caught in the springs.

Tools You’ll Need

  • Winding Bars: For torsion springs, you’ll need these to release and set the tension.
  • C-Clamps: To hold the door in place.
  • Wrenches and Sockets: Essential for loosening nuts and bolts.
  • Tape Measure: To ensure precise measurements.
  • Ladder: A sturdy ladder is crucial for reaching the springs.

Warning:

Do not use screwdrivers as winding bars. They can slip, leading to serious injury.

Step-by-Step Guide to Replacing Torsion Springs

Alright, brave soul, if you’re ready to tackle torsion springs, here’s how you do it:

1. Prepare Your Work Area

Start by clearing the area of any obstructions. You’ll need space to work, so move any vehicles, bikes, or garden gnomes out of the way.

2. Release the Tension

  1. Disconnect the opener: Pull the emergency release handle to disengage the opener.
  2. Secure the door: Use C-clamps to lock the door in place.
  3. Insert winding bars: Insert the first winding bar into the winding cone. Carefully release the tension by loosening the set screws and allowing the bar to hold the weight.
  4. Lower the tension: Slowly unwind the spring, using the second winding bar for control.

3. Remove Old Springs

  1. Loosen the screws: Using a wrench, loosen the screws holding the torsion cone.
  2. Slide the spring off: Carefully slide the spring off the torsion tube.
  3. Remove the cable drum: Detach the cable drum if needed.

4. Install New Springs

  1. Measure the new spring: Ensure it matches the old one in size and type.
  2. Attach the spring: Slide the new spring onto the torsion tube.
  3. Tighten the screws: Secure the torsion cone by tightening the set screws.

5. Wind the New Springs

  1. Insert winding bars: Use the winding bars to wind the spring.
  2. Follow manufacturer instructions: Carefully follow the number of turns specified for your door.
  3. Test the tension: Gently test the tension by removing the clamps and opening the door halfway.

6. Reattach the Opener

Reattach the garage door opener and perform a final test to ensure smooth operation.

Step-by-Step Guide to Replacing Extension Springs

If torsion springs are like dealing with a stubborn jar lid, extension springs are the child-proof medicine bottle. Here’s how to replace them:

1. Secure the Door

  1. Disconnect the opener: Pull the emergency release handle.
  2. Lock the door: Use C-clamps to hold the door in place.

2. Release Tension

  1. Lift the door: Raise the door to relieve tension on the springs.
  2. Clamp the track: Place a clamp on the track to hold the door.

3. Remove Old Springs

  1. Detach safety cables: Remove any safety cables running through the spring.
  2. Disconnect the spring: Unhook the spring from the door track and support brackets.

4. Install New Springs

  1. Attach the new spring: Connect the new spring to the door track and brackets.
  2. Run safety cables: Thread safety cables through the spring for added security.

5. Test the Door

  1. Remove clamps: Gently remove the clamps and lower the door.
  2. Reattach the opener: Connect the garage door opener and test its operation.

Choosing the Right Garage Door Spring

Not all springs are created equal. Here’s how to choose the perfect match for your door.

Torsion vs. Extension

Torsion Springs: Ideal for heavy doors and long-lasting performance.

Extension Springs: Suitable for lighter doors and cost-effective solutions.

Material

  1. Galvanized Steel: Rust-resistant but slightly less durable.
  2. Oil-Tempered Steel: Durable but prone to rust if not maintained.

Size and Length

  1. Measure carefully: Use a tape measure to determine the correct size and length.
  2. Consult professionals: If unsure, consult with experts or refer to your door’s manual.

Where to Buy

You can purchase springs at hardware stores or online. Look for reputable brands with good reviews.

Frequently Asked Questions About Garage Door Springs

How Often Should I Replace Garage Door Springs?

Garage door springs typically last 7-9 years with normal usage. However, factors like climate, frequency of use, and maintenance can affect their lifespan.

Can I Replace Just One Spring?

It’s generally recommended to replace both springs simultaneously. If one spring has worn out, the other is likely not far behind.

What Happens If I Don’t Replace Worn Springs?

Ignoring worn springs can lead to more significant issues, such as a damaged opener or a door that won’t open. It can also pose a safety risk.

How Much Does It Cost to Replace Garage Door Springs?

Professional garage door spring replacement costs can range from $200 to $400, depending on the type and size of the spring. DIY replacement is cheaper but comes with risks.

Can I Use Garage Door Opener When Springs Are Broken?

Avoid using the opener if springs are broken. Doing so can damage the opener and create a dangerous situation.

Maintenance Tips for Extending the Life of Your Garage Door Springs

A little TLC can go a long way in prolonging the life of your springs. Here are some tips:

  1. Regular Inspection: Check springs for signs of wear and tear regularly.
  2. Lubrication: Use a silicone-based lubricant to keep springs in top condition.
  3. Balance Testing: Test your door’s balance by disconnecting the opener and manually lifting the door halfway.
  4. Avoid Rust: Keep springs dry and rust-free to prevent weakening.

When to Call a Professional

Sometimes, it’s best to leave it to the pros. Here are scenarios where professional help is advisable:

  1. Complex Installations: If you have custom or unusual doors.
  2. Safety Concerns: If you’re unsure about handling tension springs.
  3. Time Constraints: If you lack the time or tools for DIY.

Finding a Reliable Professional

  1. Read Reviews: Check online reviews for trusted companies.
  2. Get Quotes: Obtain multiple quotes to ensure fair pricing.
  3. Ask Questions: Don’t hesitate to ask questions about experience and warranties.

Keep Your Garage Door Running Smoothly

Replacing garage door springs might sound like wrestling a bear, but armed with the right knowledge, it’s a manageable task. Whether you’re taking the DIY route or calling in the cavalry, understanding the mechanics of these springs ensures you’re making informed decisions.

Remember, safety is key. If ever in doubt, trust the experts to handle the heavy lifting. Keep those springs in check, and your garage door will thank you with years of faithful service.

Here’s to smooth operations and hassle-free mornings!


By following this guide, you’ll be well-equipped to tackle garage door spring replacement with confidence. Whether you’re a DIY aficionado or just a curious homeowner, this comprehensive look into garage door springs provides all the information you need.

Learn How to Adjust Garage Door Springs

By blog, Service & Repair

Adjusting garage door springs might seem as simple as pie, but it requires a keen eye and a steady hand. If you’ve ever had that nagging feeling when your garage door doesn’t open as smoothly as it should, you’re not alone. Let’s dive into the nitty-gritty of garage door spring adjustment. This guide is all about making your life a tad more accessible by helping you keep those garage doors operating like a well-oiled machine.

Understanding Garage Door Springs

Before we roll up our sleeves, let’s discuss what garage door springs do. These springs are the unsung heroes of your garage door system. They counterbalance the door’s weight, making it easier to open and close. Imagine lifting a ten-pound bag of potatoes without help—that’s what a garage door is like without springs.

Types of Garage Door Springs

There are two main types of garage door springs: torsion springs and extension springs.

Torsion Springs

These are typically mounted horizontally above the garage door. Torsion springs work by twisting and are known for their durability and reliability. They’re like the star quarterback of the spring world.

Extension Springs

Extension springs, on the other hand, are mounted on either side of the garage door and stretch to provide lifting power. They’re more like the unsung heroes who do their job quietly and efficiently.

Tools You’ll Need for the Job

Before you dive into adjusting your garage door springs, it’s essential to have the right tools. Here’s a handy list to get you started:

  • Safety glasses: Because your eyes are priceless!
  • Work gloves: To keep your hands safe and sound.
  • Winding bars (for torsion springs): These bars are designed to adjust torsion springs.
  • Adjustable wrench: For loosening and tightening nuts and bolts.
  • Tape measure: To ensure precise measurements.
  • Ladder: To reach those high spots with ease.
  • C-clamps or locking pliers: Keep the door in place while you work.

Safety Precautions

Let’s talk safety before you jump into the deep end. Adjusting garage door springs can be dangerous if not done correctly. These springs are under much tension, and mishandling them can lead to serious injuries. Here’s what you need to know:

Why Safety Matters

Imagine a slingshot pulled back, ready to release – that’s the tension we’re dealing with here. A sudden snap could cause injury, so taking the necessary precautions is crucial.

Steps for Safe Adjustment

  1. Disconnect the power: Always unplug the garage door opener before starting your work.
  2. Secure the door: Use C-clamps or locking pliers to hold the door in place.
  3. Use the right tools: Avoid makeshift tools; they can lead to accidents.
  4. Wear safety gear: Protect your eyes and hands.

Step-by-Step Guide to Adjusting Torsion Springs

Torsion springs can be a bit tricky, but don’t worry – we’ve got your back. Follow these steps for a smooth adjustment process:

Step 1: Determine the Issue

Before you begin, identify the problem with your garage door. Does it open too quickly? Does it slam shut? Knowing the issue will guide your adjustments.

Step 2: Gather Your Tools

Make sure you have all the necessary tools mentioned earlier. You don’t want to be halfway up the ladder and realize you left something behind.

Step 3: Secure the Garage Door

Use your C-clamps or locking pliers to secure the door in place. Safety first!

Step 4: Adjust the Tension

  • Locate the winding cone: This is where you’ll insert your winding bars.
  • Insert the winding bar: Place it into one of the holes in the cone.
  • Loosen the set screws: Use your wrench to slightly loosen the screws that hold the winding cone in place.
  • Adjust the spring: Turn the winding bar to increase or decrease tension as needed.
  • Tighten the set screws: Once the adjustment is complete, make sure the set screws are tight.

Step 5: Test the Door

Remove the C-clamps and test the door. Does it open and close smoothly? If not, repeat the adjustment process as needed.

Step 6: Double Check Everything

Before calling it a day, double-check that everything is secure and functioning correctly.

Step-by-Step Guide to Adjusting Extension Springs

If you’re dealing with extension springs, the process is a bit different but equally manageable.

Step 1: Identify the Problem

Like with torsion springs, start by identifying the issue with your garage door.

Step 2: Assemble Your Tools

Gather all the tools you’ll need. Remember, preparation is half the battle!

Step 3: Secure the Garage Door

Use C-clamps or locking pliers to keep the door in place while you work.

Step 4: Adjust the Spring Tension

  • Locate the adjustment hook: This is where you’ll make your adjustments.
  • Move the hook: Use your hands or pliers to move the hook to a new position on the track.
  • Test the tension: Open and close the door to see if the tension is proper.

Step 5: Recheck and Test

After making adjustments, remove the C-clamps and test the door’s functionality. Fine-tune if necessary.

Step 6: Final Inspection

Ensure everything is secure and functioning as expected before you wrap up.

Troubleshooting Common Garage Door Spring Issues

Even with all this information, you might run into some roadblocks. Here’s how to tackle common issues:

Problem: Garage Door Won’t Open Fully

  • Check the tension: The springs might be too loose.
  • Inspect the tracks: Ensure they’re not obstructed.

Problem: Garage Door Closes Too Quickly

  • Increase the tension: The springs might need more tension to slow the door down.
  • Check the balance: Make sure the door is balanced properly.

Problem: Noisy Garage Door

  • Lubricate the springs: Use a silicone-based lubricant.
  • Inspect for wear: Look for signs of damage or wear and replace parts if necessary.

When to Call a Professional

While adjusting garage door springs can be a DIY project, sometimes it’s best to call in the pros. If you’re unsure about anything or if the job seems too risky, don’t hesitate to get professional help.

Signs You Need Professional Help

  • Visible damage: If the springs are visibly worn or damaged.
  • Lack of confidence: If you’re not confident in your ability to adjust the springs safely.
  • Complex issues: For problems that persist despite your efforts.

Maintenance Tips for Garage Door Springs

Keeping your garage door springs in tip-top shape can prevent the need for frequent adjustments. Here are some maintenance tips:

Regular Inspections

Take a few minutes every month to inspect your garage door springs for signs of wear or damage.

Lubrication

Use a silicone-based lubricant to keep the springs running smoothly. This can also help reduce noise.

Balance Check

Check the balance of your garage door regularly to ensure it’s operating correctly. An unbalanced door can put extra strain on the springs.

Frequently Asked Questions (FAQs)

1. Can I adjust garage door springs myself?

Yes, you can adjust them yourself, but it’s important to follow safety precautions and use the correct tools. If you’re unsure, it’s best to call a professional to replace garage door springs.

2. How often should garage door springs be adjusted?

Typically, garage door springs need adjustment every few years, depending on usage. Regular inspections can help determine when adjustments are necessary.

3. What are the signs that my garage door springs need adjustment?

Signs include the door not opening or closing smoothly, the door slamming shut, or the door being difficult to open.

4. Can I replace garage door springs myself?

Replacing springs is more complex and risky than adjusting them. It’s recommended to have a professional handle spring replacements.

5. What should I do if my garage door spring breaks?

If a spring breaks, stop using the door immediately and call a professional for replacement. A broken spring can be dangerous and should not be handled without proper expertise.

Adjusting garage door springs might seem like a Herculean task, but with the right tools and knowledge, it’s doable. Whether dealing with torsion springs or extension springs, the key is to take it slow and steady. Remember, safety comes first! If you’re ever in doubt, don’t hesitate to call a professional. After all, a smooth-running garage door makes life just a little bit easier.

Find Where to Buy Garage Door Replacement Panels

By blog, Service & Repair

Where to Buy Garage Door Replacement Panels Online

The internet has made it incredibly convenient to purchase garage door replacement panels from the comfort of your home. Here are some reliable online platforms where you can find quality panels.

Top Online Retailers for Garage Door Panels

  1. Amazon
    • Pros: Wide variety of options, competitive pricing, and customer reviews to guide your decision.
    • Cons: Shipping times can vary, and sometimes the selection may not match specific brands.
  2. Home Depot
    • Pros: Offers both online and in-store shopping, a vast selection of panels, and trusted brand names.
    • Cons: Prices might be slightly higher than some online-only retailers.
  3. Lowe’s
    • Pros: Known for quality and variety, Lowe’s provides a good selection of garage door panels.
    • Cons: Availability may depend on your location.
  4. Wayfair
    • Pros: Offers stylish and customizable options, especially for those seeking a more aesthetic upgrade.
    • Cons: May have fewer choices for more utilitarian or basic panels.
  5. eBay
    • Pros: Great for finding unique or discontinued panels, often at a discount.
    • Cons: Purchase comes with a risk, as you’re buying from individual sellers.
  6. Clopay’s Official Website
    • Pros: Direct from the manufacturer, ensuring you get the right fit for Clopay doors.
    • Cons: Limited to Clopay products.

Things to Consider When Buying Online

  • Compatibility: Ensure the panel is compatible with your existing garage door model.
  • Material: Consider the material of the panel, whether it’s wood, steel, aluminum, or fiberglass, to match your existing door.
  • Return Policy: Check the return policy in case the panel doesn’t fit or meet your expectations.

Replacing garage door panels might seem like a daunting task. However, with the right information, it can be straightforward and rewarding. Whether you’re dealing with damage from a runaway basketball or wear and tear over the years, replacing panels is a necessary part of maintaining your garage door’s functionality and appearance.

In this guide, we’ll explore everything you need to know about replacing garage door panels, where to buy them, and how to ensure you’re getting the best bang for your buck.


Introduction to Garage Door Panels

Garage doors are more than just a functional part of your home; they’re a significant aspect of its curb appeal. When panels are damaged, it doesn’t just affect how your home looks. It can also impact the garage door’s operation and security. Let’s take a look at what garage door panels do and why they matter.

What Are Garage Door Panels?

Garage door panels are the sections or segments of a garage door that collectively form its structure. They come in various materials, styles, and colors, each contributing to the door’s overall aesthetics and performance.

Why Do Garage Door Panels Need Replacement?

  • Damage: Accidents happen. Whether it’s a basketball gone astray or a car bumper misjudged, panels can sustain damage.
  • Wear and Tear: Over time, panels can warp, fade, or break, especially in areas with harsh weather.
  • Aesthetic Updates: Sometimes, you just want a new look. Changing panels is a great way to refresh your garage door’s appearance.

How to Replace Garage Door Panels

Before diving into where to buy replacement panels, it’s crucial to understand the process of replacing them. This knowledge will empower you to make informed purchasing decisions.

Steps to Replace Garage Door Panels

  1. Identify the Problem Panel(s): Before buying anything, determine which panels need replacement. This involves inspecting the entire door for cracks, dents, or warping.
  2. Measure the Panel: Accurate measurements ensure that the replacement panel will fit perfectly. Measure the height, width, and thickness of the panel.
  3. Purchase the Replacement Panel: Once you have your measurements, you can start shopping for a new panel that matches your door’s specifications.
  4. Remove the Damaged Panel: Carefully disconnect the garage door opener and support the door before removing the panel. This step may require some help, as garage doors can be heavy.
  5. Install the New Panel: Align the new panel with the existing ones and secure it in place. Ensure all the hardware is tightened, and the panel fits seamlessly with the others.
  6. Test the Door: Reconnect the garage door opener and test the door to ensure everything operates smoothly.

Tools You’ll Need

  • Screwdriver set
  • Hammer
  • Pliers
  • Tape measure
  • Safety goggles

Tip: Always prioritize safety. If you’re unsure about any part of the replacement process, consult a professional.


Material Matters: Choosing the Right Panels

Garage door panels come in various materials, each offering unique benefits and drawbacks. Choosing the right material is crucial for ensuring longevity and performance.

Types of Materials

  1. Wood
    • Pros: Offers a classic, timeless look and can be customized easily.
    • Cons: Requires regular maintenance to prevent rot and warping.
  2. Steel
    • Pros: Durable and offers excellent security.
    • Cons: Can rust if not properly maintained, and may dent easily.
  3. Aluminum
    • Pros: Lightweight and resistant to rust.
    • Cons: Not as durable as steel and may dent more easily.
  4. Fiberglass
    • Pros: Resistant to weathering and offers a modern look.
    • Cons: Can become brittle in cold weather and may fade over time.
  5. Vinyl
    • Pros: Durable and low-maintenance.
    • Cons: Limited color options and styles compared to other materials.

Garage Door Panel Replacement Cost Considerations

Understanding the cost of garage door panels is essential for budgeting and making informed purchasing decisions. Let’s break down the factors that influence pricing.

Factors Affecting Cost

  1. Material: As mentioned, different materials have varying costs. Wood is typically more expensive, while steel and vinyl offer more budget-friendly options.
  2. Size: Larger panels will generally cost more. Measure your door accurately to avoid unnecessary expenses.
  3. Design and Style: Custom designs or decorative panels may come at a premium price.
  4. Brand: Established brands like Clopay might charge more due to their reputation for quality.

Average Costs of Garage Door Panels

  • Wood Panels: $250 – $400 per panel
  • Steel Panels: $150 – $300 per panel
  • Aluminum Panels: $100 – $200 per panel
  • Fiberglass Panels: $200 – $350 per panel
  • Vinyl Panels: $150 – $250 per panel

Tip: Look for discounts and promotions online, especially during holiday sales or off-season times.


Pros and Cons of DIY Replacement vs. Professional Help

Deciding whether to replace garage door panels yourself or hire a professional can impact both cost and outcome. Let’s explore the benefits and drawbacks of each approach.

DIY Replacement

Pros:

  • Cost-Effective: Save money on labor costs.
  • Flexibility: Work on your schedule.
  • Learning Experience: Gain valuable DIY skills.

Cons:

  • Risk of Mistakes: Incorrect installation can lead to further damage.
  • Time-Consuming: It may take longer if you’re inexperienced.
  • Safety Concerns: Garage doors are heavy and can be dangerous to work with.

Professional Replacement

Pros:

  • Expertise: Professionals ensure the job is done correctly and efficiently.
  • Safety: They have the tools and knowledge to handle potential hazards.
  • Warranty: Many professionals offer warranties on their work.

Cons:

  • Higher Cost: Paying for labor adds to the overall expense.
  • Scheduling: You’ll need to coordinate with the service provider.

Tip: If you’re not confident in your skills, it’s wise to consult a professional for garage door panel replacement.


Maintenance Tips for Longevity

Once you’ve replaced your garage door panels, keeping them in good condition is essential. Proper maintenance ensures they last longer and function smoothly.

Regular Maintenance Tips

  • Clean Regularly: Use mild soap and water to clean panels and remove dirt and debris.
  • Inspect for Damage: Regularly check for cracks, dents, or other signs of wear.
  • Lubricate Moving Parts: Apply lubricant to hinges, rollers, and tracks to prevent squeaking and friction.
  • Paint and Seal: For wood panels, repaint and seal every few years to protect against moisture and UV damage.
  • Check Weatherstripping: Ensure the weatherstripping is intact and replace it if necessary to keep out drafts and moisture.

Environmental Considerations

In today’s eco-conscious world, considering the environmental impact of your garage door panel choices is essential.

Eco-Friendly Options

  1. Recycled Materials: Some manufacturers offer panels made from recycled materials, reducing waste and energy consumption.
  2. Insulated Panels: Insulated panels improve energy efficiency, keeping your garage temperature stable.
  3. Sustainable Wood: Choose panels made from sustainably sourced wood to minimize environmental impact.

Tip: Look for certifications or labels indicating environmentally friendly manufacturing processes.


Q&A: Common Questions About Garage Door Replacement Panels

1. Where to Buy Garage Door Replacement Panels Online?

Finding the right replacement panels online can be as simple as a few clicks, but knowing where to look is crucial. Websites like Amazon, Home Depot, and Lowe’s offer a broad selection of garage door panels. Each of these platforms provides customer reviews, specifications, and competitive pricing, helping you make an informed decision.

If you’re looking for specific brands like Clopay, checking the manufacturer’s website directly can be a good choice. They often have detailed information and options tailored to their products, ensuring compatibility and quality.

Additional Online Retailers:

  • Overstock: Offers unique and often discounted panels.
  • Menards: Known for a range of affordable options and regional availability.
  • Wayfair: Great for those looking for stylish and custom designs.

2. How to Replace Garage Door Panels?

Replacing garage door panels is a process that requires careful attention to detail. Here’s a step-by-step guide:

  1. Safety First: Disconnect the garage door opener and unplug the motor to avoid accidental operation.
  2. Support the Door: Use clamps or have a friend help hold the door in place while you work.
  3. Remove the Damaged Panel: Unbolt the panel and carefully slide it out, taking care not to damage other parts.
  4. Install the New Panel: Align the new panel with the rest of the door, ensuring all holes and fasteners line up.
  5. Secure the Panel: Bolt the new panel in place and double-check all connections.
  6. Test the Door: Reconnect the opener and test the door’s operation to make sure everything is smooth and aligned.

Tools You Might Need:

  • Socket wrench
  • Screwdriver
  • Adjustable wrench
  • Ladder
  • Safety goggles

Tip: If you encounter any issues during installation, don’t hesitate to consult online tutorials or seek professional assistance.

3. How Much Are Garage Door Panels?

The cost of garage door panels can vary widely depending on the material, design, and brand. Here’s a general breakdown of the price range for different types of panels:

  • Wood Panels: $250 – $400 per panel
  • Steel Panels: $150 – $300 per panel
  • Aluminum Panels: $100 – $200 per panel
  • Fiberglass Panels: $200 – $350 per panel
  • Vinyl Panels: $150 – $250 per panel

Factors Influencing Cost:

  • Material: Higher-end materials like wood tend to be more expensive.
  • Brand: Reputable brands often come with a premium price.
  • Size: Larger panels will naturally cost more.
  • Custom Features: Decorative elements or custom designs add to the cost.

Tip: Always compare prices from multiple sources to ensure you get the best deal.

4. Where to Buy Clopay Garage Door Replacement Panels?

Clopay is a well-known brand in the garage door industry, offering high-quality and durable panels. To buy Clopay replacement panels, consider the following options:

  • Clopay’s Official Website: Purchase directly from the manufacturer for guaranteed compatibility.
  • Home Depot: They carry a wide range of Clopay products, often with online ordering and in-store pickup.
  • Amazon: Offers a selection of Clopay panels, along with customer reviews to guide your purchase.

Tip: Always check for specific product numbers to ensure the panel you purchase is the right fit for your garage door.

5. Can I Replace Just One Panel on My Garage Door?

Yes, you can replace just one panel if it’s damaged, provided the rest of the door is in good condition. Replacing a single panel is cost-effective and relatively simple. However, make sure the new panel matches the rest of the door in terms of color, design, and material.

Steps for Replacing a Single Panel:

  1. Identify the Panel: Determine which panel needs replacement and take measurements.
  2. Purchase a Matching Panel: Find a panel that matches your existing door.
  3. Replace the Panel: Follow the steps outlined earlier to remove the damaged panel and install the new one.

Tip: If your garage door is older, finding an exact match might be challenging. In such cases, consider repainting the entire door for a uniform look.

6. What Are the Benefits of Insulated Garage Door Panels?

Insulated garage door panels offer several advantages, making them a popular choice for homeowners:

  1. Energy Efficiency: Insulated panels help regulate temperature, reducing heating and cooling costs.
  2. Noise Reduction: They provide a quieter operation by dampening vibrations and sound.
  3. Durability: Insulated panels are often more robust, providing better protection against dents and impacts.

Types of Insulation:

  • Polystyrene: Provides moderate insulation and is more affordable.
  • Polyurethane: Offers superior insulation and is more rigid and durable.

Tip: Consider your climate and garage usage when deciding on insulation. For example, insulated panels are ideal for garages that double as workshops or living spaces.

7. How Long Do Garage Door Panels Last?

The lifespan of garage door panels depends on various factors, including material, maintenance, and environmental conditions. Here’s an overview of what you can expect:

  • Wood Panels: 15-30 years with proper maintenance.
  • Steel Panels: 20-30 years, especially if they’re well-maintained and protected from rust.
  • Aluminum Panels: 20-30 years, given their resistance to rust.
  • Fiberglass Panels: 15-25 years, though they may become brittle over time.
  • Vinyl Panels: 20-30 years, thanks to their durability and resistance to weathering.

Tip: Regular maintenance, such as cleaning and lubricating moving parts, can significantly extend the life of your garage door panels.

8. Are There Custom Options for Garage Door Panels?

Absolutely! Many manufacturers offer custom options for garage door panels, allowing you to choose designs, colors, and materials that perfectly match your home’s aesthetic. Custom panels can include unique features such as:

  • Window Inserts: Add style and natural light to your garage.
  • Decorative Hardware: Enhance the door’s appearance with custom handles and hinges.
  • Specialty Finishes: Choose from various finishes to achieve the look you desire.

Tip: Custom options are typically more expensive and may require longer lead times. Consider this when planning your garage door update.

9. What Are the Common Signs That Garage Door Panels Need Replacement?

Recognizing the signs that your garage door panels need replacement can prevent more significant issues down the line. Here are some common indicators:

  • Visible Damage: Cracks, dents, or warping are clear signs that panels need attention.
  • Operational Issues: If the door struggles to open or close smoothly, damaged panels may be the culprit.
  • Increased Noise: Excessive noise during operation can signal that panels are misaligned or damaged.
  • Drafts and Leaks: Gaps or cracks in panels can allow air and moisture to enter, indicating a need for replacement.

Tip: Regular inspections can catch these issues early, saving you time and money in the long run.

10. Can I Paint My Garage Door Panels?

Yes, painting your garage door panels is an excellent way to refresh your home’s appearance. Here’s how to do it:

  1. Clean the Panels: Remove dirt and grime with mild soap and water.
  2. Sand the Surface: Lightly sand the panels to ensure paint adherence.
  3. Apply Primer: Use a primer suitable for the panel material.
  4. Paint: Choose a high-quality exterior paint and apply evenly.
  5. Seal: For wood panels, apply a sealant to protect against moisture.

Tip: Always use paint designed for outdoor use, as it will withstand the elements better.

11. How Do I Ensure a Good Fit for Replacement Panels?

Ensuring a perfect fit for replacement panels is crucial for seamless operation and aesthetics. Here’s what to do:

  1. Accurate Measurements: Measure the height, width, and thickness of the existing panels.
  2. Check Manufacturer Specifications: Use the manufacturer’s specs for a precise match.
  3. Consult a Professional: If unsure, consult a garage door professional for guidance.

Tip: When in doubt, bring the old panel to the store for a direct comparison.


Replacing garage door panels is a manageable task that can significantly enhance the appearance and functionality of your garage door. By understanding how to replace panels, where to buy them, and what factors to consider, you’re well-equipped to tackle this project confidently.

Whether you’re opting for a DIY approach or hiring a professional, the key is to make informed decisions based on your specific needs and preferences. With the right panels, tools, and knowledge, your garage door can continue to serve as a reliable and attractive part of your home.

Remember, when it comes to maintaining and upgrading your garage door, the possibilities are endless. So, dive in, explore your options, and transform your garage into a space that reflects your style and meets your functional needs.

Happy garage door panel shopping!

Common Garage Door Issues in Scottsdale, AZ, and How to Fix Them

By blog

Living in Scottsdale, AZ, homeowners often face unique challenges with their garage doors due to the extreme weather conditions. Understanding these common issues and knowing how to address them can save time and money. This guide explores the most frequent garage door problems in Phoenix and provides practical solutions.

1. Overheating of Garage Door Components

Issue: The intense heat in Phoenix can cause overheating of the garage door’s mechanical parts, leading to malfunctions.

Solution: Regular maintenance, including lubrication of moving parts with high-temperature resistant lubricants, can prevent overheating. It’s also advisable to install a garage door with insulation to reduce heat absorption.

2. Warping and Misalignment

Issue: Wooden garage doors or metal doors without proper insulation can warp due to the heat, leading to misalignment.

Solution: If warping is minor, adjusting the tension of the tracks and springs can realign the door. In severe cases, replacing the door with a material more suited to Phoenix’s climate, like fiberglass, may be necessary.

3. Fading and Discoloration

Issue: Prolonged exposure to sunlight can cause fading and discoloration of the garage door.

Solution: Applying UV-resistant paint or finish can protect against sun damage. Regular maintenance like cleaning and repainting can also keep the door looking new.

4. Expansion and Contraction

Issue: Fluctuating temperatures can cause materials to expand and contract, affecting the door’s operation.

Solution: Regular inspections and adjustments to springs, tracks, and tension can mitigate these effects. Choosing materials less prone to expansion, like steel or aluminum, can also help.

5. Dust and Debris Accumulation

Issue: The desert environment of Phoenix leads to dust and debris accumulation in the garage door mechanism, causing it to malfunction.

Solution: Regular cleaning of the tracks and lubrication of the moving parts can prevent buildup. Installing weather stripping can also help keep dust out.

6. Electronic Opener Failures

Issue: High temperatures can affect the electronics of garage door openers.

Solution: Ensure the opener is of high quality and suited for extreme temperatures. Regular checks and maintenance of the opener can prevent failures.

7. Weather Seal Deterioration

Issue: The weather seal at the bottom of the door can deteriorate due to heat, allowing dust and pests to enter.

Solution: Inspect the weather seal regularly and replace it when signs of wear and tear are visible.

8. Sensor Malfunction

Issue: Extreme sunlight can sometimes interfere with the sensors of the garage door, causing it to not close properly.

Solution: Regular cleaning and realignment of the sensors can fix this issue. In some cases, shading the sensors slightly can prevent sunlight interference.

Dealing with garage door issues in Phoenix, AZ, requires an understanding of how the local climate affects different components of the door. Regular maintenance, choosing the right materials, and being proactive in addressing the first signs of trouble can prevent most problems. However, for complex issues, seeking professional help is recommended to ensure safety and efficiency.

The Risks of DIY Garage Door Installation

By blog

In today’s DIY-centric culture, homeowners are often tempted to engage in garage door DIY, lured by the potential cost savings. Yet, this route overlooks significant garage door installation risks. This article aims to shed light on the potential hazards of DIY garage door installation, underscoring why professional installation is a safer and more reliable option.

Understanding the Complexity of Garage Door Installation

Garage door DIY involves more than just setting a door on a track. It encompasses precise alignment, correct tensioning of springs, connecting electronic openers, and accurately configuring safety features. These complex tasks are crucial for effective garage door maintenance but are frequently underestimated in DIY attempts, leading to increased risks and possible complications.

The Risk of Physical Injury

A major concern with garage door DIY is the elevated risk of physical injury. Garage doors are heavy. Without the right tools and expertise, mishandling can lead to serious accidents, such as a door falling or an installer getting trapped underneath. Moreover, the high-tension springs in garage door installations pose a significant hazard. If improperly installed, they might snap, causing grave injuries, and highlighting a critical garage door installation risk.

Improper Installation and Safety Hazards

Incorrectly installed garage doors can pose numerous safety hazards. An unbalanced door might close abruptly or unevenly, endangering people and property. Such garage door opener installation risks can also lead to failure in meeting safety standards, thereby increasing the likelihood of accidents and undermining the effectiveness of ongoing garage door maintenance.

Potential for Long-term Damage

Garage door DIY can lead to long-term damage to the door. Improper installation often results in misalignment, causing excessive wear on parts and necessitating frequent garage door maintenance. This diminishes the door’s lifespan and negates any initial savings from DIY installation.

Voiding Warranties

An important aspect often overlooked in garage door DIY is the risk of voiding the garage door warranty. Many manufacturers specify that warranties remain valid only with professional installation. Attempting a DIY installation can thus void these warranties, leaving homeowners without support for future issues, a crucial point in garage door maintenance.

Overlooking Security Features

Modern garage doors include advanced security features that might be neglected or incorrectly installed in DIY projects. This oversight can compromise home security, negating the benefits of professional garage door installation and maintenance.

The Time and Effort Factor

The time and effort required for a garage door DIY project are substantial. What seems like a simple task can evolve into a lengthy, challenging process, especially without prior experience in garage door maintenance and installation.

The Hidden Costs

Opting out of professional installation to save money can be deceptive. The hidden costs of a DIY approach, like repairs due to improper installation, additional tool purchases, and potential garage door maintenance issues, can accumulate, surpassing the cost of professional installation.

Why Professional Installation is the Safer Choice

Professional garage door installers offer the necessary experience, tools, and expertise for a safe, efficient, and correct installation. They adeptly handle the complexities of garage door installation, ensuring the safety and functionality of your garage door and maintaining the validity of your garage door warranty.

Conclusion

While DIY projects and the allure of saving money are attractive, the risks involved in garage door installation, particularly regarding safety, complexity, and potential warranty voidance, are significant. Homeowners should prioritize safety, long-term functionality, and reliable garage door maintenance over short-term savings. Choosing professional installation mitigates these risks and ensures the preservation of the garage door warranty.

How to Choose the Right Garage Door: A Guide for Homeowners

By blog

Hello there! If you’re like me, your home is your haven, and every detail counts, especially when it comes to choosing the right garage door. It’s not just about aesthetics; it’s about functionality, security, and, yes, even insulation. So, let’s dive into what you must consider when selecting that perfect garage door.

Understanding Insulation in Garage Doors

First things first, let’s talk about insulation. Garage door insulation isn’t just a buzzword; it’s a crucial factor in ensuring energy efficiency and comfort in your home. Insulated garage doors keep the heat out during summer and retain warmth during winter, making your garage a more usable space all year round.

But how do you choose the right insulation? It’s all about understanding R-values – a measure of thermal resistance. The higher the R-value, the better the insulation. When looking at insulated garage doors, pay close attention to this number.

DIY vs. Professional Installation

You might be thinking, “Can I install or insulate my garage door myself?” Well, it’s possible. With a garage door insulation kit, you can embark on a DIY project to insulate a garage door. It can be a fun weekend project if you’re handy. However, while DIY is doable, I can’t stress enough the importance of considering professional garage door service and repair.

Why? Because garage doors involve complex mechanisms that require precise installation. Professionals ensure that everything from the balance to the alignment is perfect, reducing the risk of future problems. Plus, they can advise you on the best type of insulation for your specific door.

Choosing the Right Material and Style

Material matters. The common garage door materials include wood, steel, aluminum, and fiberglass. Each has its pros and cons. Wood offers a classic look but requires more maintenance. Steel is durable and low-maintenance. Aluminum is lightweight and resistant to rust, while fiberglass is versatile in terms of design but can be more expensive.

Style is equally important. You want your garage door to complement your home’s architecture. Whether it’s a traditional carriage style, contemporary, or something in between, the style of your garage door should blend seamlessly with your home’s overall aesthetic.

Consider the Opener

A garage door opener is like the heart of the garage door system. You want an opener that’s reliable, quiet, and has the features you need, like security measures or smart home compatibility.

Safety and Security Features

Safety is paramount. Look for features like automatic reverse, which stops and reverses a closing door if it detects an object in its path. Security features like rolling code technology can protect your garage from intruders.

Budgeting for Quality

While budget is always a consideration, remember that the cheapest option isn’t always the best in the long run. Investing in a high-quality garage door can save you money on repairs and energy bills down the line.

Final Thoughts

In conclusion, while you can go the DIY route with a garage door insulation kit and some elbow grease, professional garage door service, and repair offer peace of mind and ensure your door functions perfectly and safely. Remember, the right garage door boosts your home’s curb appeal, improves energy efficiency, and ensures comfort and security.

I hope this guide helps you in making an informed decision. You’re not just choosing a garage door; you’re enhancing your home. Here’s to finding the perfect garage door for your sanctuary!

Embracing the Future: Smart Garage Doors in 2024

By blog

Hello fellow homeowners! As we edge closer to 2024, it’s thrilling to see how our homes, especially garage doors, are evolving. Gone are the days of simple, manual doors. Let’s chat about the exciting blend of technology and design that’s transforming our garage doors into smart, stylish, and secure home features.

The Rise of Smart Garage Door Technology

I’m sure you’ve heard about making your garage door smart, but have you seen the latest? Imagine controlling your garage door with just a voice command or a tap on your smartphone. We’re not just talking about convenience here; we’re talking about a whole new level of home automation. With the best smart garage door opener, you can monitor and control access to your home, no matter where you are. In 2024, expect this to be the norm, with garage doors seamlessly integrating into our smart homes.

Revolutionizing Security

Now, let’s talk about garage door security. It’s a big deal for all of us, right? The future is about advanced locks and alarm systems. Picture this: your garage door recognizing you through facial recognition or your fingerprint. That’s the kind of security we’re looking at in 2024 – personalized and impenetrable. It’s not just about keeping your car safe; it’s about protecting your entire home.

Energy Efficiency and Eco-Friendly Designs

Energy efficiency is not just a trend; it’s a necessity. I’m excited to see more insulated garage doors, designed to keep your garage temperate and your energy bills low. And it’s not just about insulation. We’re talking sustainable materials and designs that complement your home’s aesthetics while being kind to the planet.

Stylish Garage Doors: More Than Just Functional

Your garage door can be a statement piece. Think bold colors, sleek finishes, and custom designs that reflect your style. In 2024, expect to see garage doors with unique textures, glass panels, and even digital displays. It’s all about making your home’s exterior as stylish as its interior.

Durability Meets Low Maintenance

We all want a garage door that stands the test of time without constant upkeep, right? The future promises materials that resist weathering and corrosion, maybe even self-repairing technologies! Imagine a garage door that keeps itself clean – now that’s what I call smart.

Revolutionary Opening Mechanisms

Quiet, fast, and efficient – the future of garage door openers is all about smooth operation. We’re moving away from clunky mechanisms to more refined options like belt drives and direct drives. And for those of us with limited garage space, new opening technologies that require less overhead room are a game-changer.

Seamless Connectivity and Integration

In 2024, your garage door isn’t just a part of your home; it’s a part of your digital life. We’re talking about doors that update their software automatically, diagnose issues remotely, and integrate with a wide range of smart home systems. It’s all about making life easier and more connected.

Prioritizing Safety

Safety will always be paramount. With advanced sensors and auto-reverse features, garage doors will become even safer, preventing accidents more effectively. Innovations in safety technology mean peace of mind for you and your family.

Wrapping Up: The Future is Here

So, there you have it! The future of garage doors in 2024 is all about blending smart technology with style, security, and sustainability. These innovations aren’t just about convenience; they’re about enhancing the safety, efficiency, and beauty of our homes. It’s an exhilarating time to be a homeowner!

Remember, upgrading to a smart garage door isn’t just about keeping up with trends; it’s about embracing a lifestyle that’s efficient, secure, and stylish. Can’t wait to see how these advancements unfold? Me neither! Here’s to making our homes smarter, one garage door at a time!

Boosting Your Garage Door Security: Tips and Tricks for Homeowners

By blog

Hey there! If you’re like me, you understand the importance of keeping your home safe, and that includes securing your garage door from potential thieves. Today, I want to share some valuable insights on how you can beef up your garage door security. Whether you’re a DIY enthusiast or prefer professional installation, there’s something here for you.

Understanding the Basics of Garage Door Security

First, let’s talk about garage door locks. A sturdy lock is your first line of defense against break-ins. If you’re still using that old lock that came with your garage, it might be time for a garage door lock replacement. The market is flooded with robust options that can significantly enhance your security.

But wait, there’s more! Have you heard about garage door smart locks? These nifty devices allow you to control access to your garage with just a tap on your smartphone. Imagine getting alerts every time your garage door opens or closes – that’s what smart locks offer. And guess what? Installing these isn’t as complicated as it sounds.

DIY Security Enhancements

Now, for my fellow DIYers, there are plenty of ways to improve your garage door’s security on your own. Let’s start with garage door locks. You can easily find a variety of locks that are simple to install. From slide locks to bolt locks, pick one that suits your door and your skill level.

But don’t stop there. Did you know that reinforcing the service door to your garage is just as important? Adding a deadbolt or upgrading the door’s hinges can make a significant difference. Also, consider covering or frosting your garage windows to prevent thieves from peeking inside.

Professional Solutions for Optimal Security

Sometimes, it’s best to leave things to the professionals, especially when it comes to garage door lock replacement or installing sophisticated systems. Professional installers can assess your garage door and suggest the best garage door locks to suit your needs. They can handle complex installations, like integrating smart locks with your home security system, ensuring everything works seamlessly.

Professionals can also advise you on additional security measures. For instance, installing a garage door smart lock that requires biometric authentication, like a fingerprint or facial recognition, for access. This level of security might sound like something from a spy movie, but it’s available and quite effective!

Regular Maintenance: A Key Aspect of Security

You might not realize it, but regular maintenance of your garage door is crucial for security. A well-maintained door is less likely to have vulnerabilities that thieves can exploit. So, make sure to schedule regular check-ups with a garage door service. They can spot and fix potential issues like weak springs or faulty openers before they become a security risk.

Additional Tips to Fortify Your Garage Door

Here are some extra tips to beef up your garage door security:

  • Install motion-sensor lights around your garage.
  • Use a garage door timer that automatically closes the door after a certain period.
  • Regularly check and replace batteries in electronic locks and openers.

Wrapping Up: Your Garage Door, Your Fortress

So, there you have it! Whether you choose the DIY route or opt for professional installation, enhancing your garage door security is crucial. Remember, a secure garage door not only protects your belongings but also adds an extra layer of defense to your home.

I encourage you to take a good look at your current garage door security setup. Is it time for a garage door lock replacement? Maybe it’s time to upgrade to a garage door smart lock? Whatever path you choose, know that securing your garage door is a smart investment in your home’s safety.

Stay safe and secure, and let’s keep those thieves at bay with our fortified garage doors!

Troubleshooting Common Garage Door Remote Issues and How to Fix Them

By blog

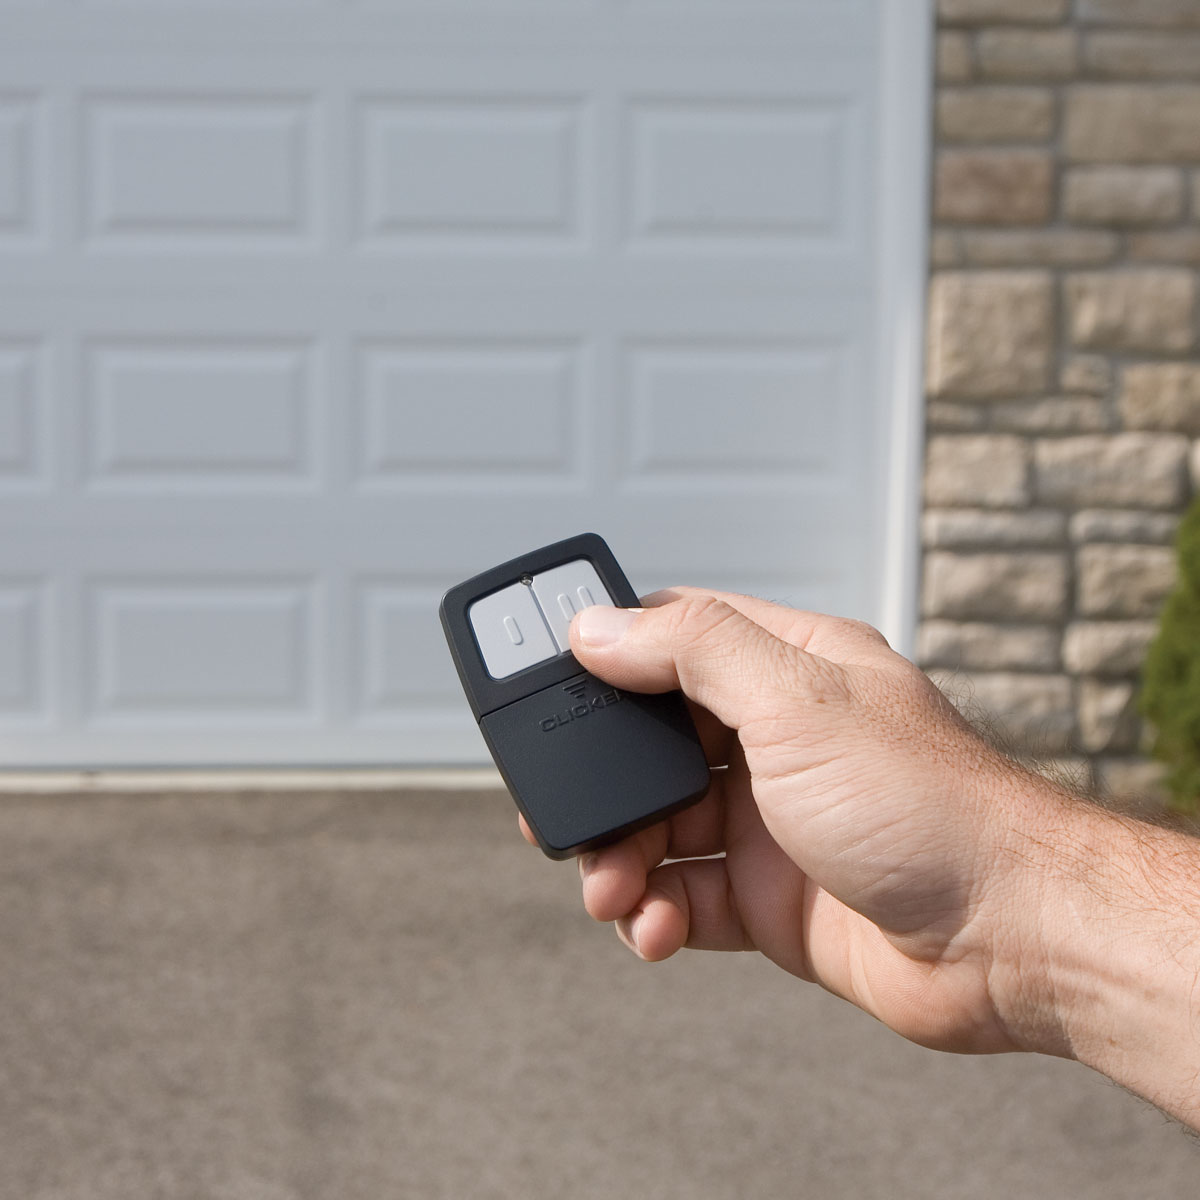
Garage door remotes, essential for convenience and security in our daily lives, sometimes face malfunctions like any electronic device. If you’re pressing your garage door remote with no response, you’re not alone. This guide will delve into common garage door remote issues, offering practical solutions for homeowners to troubleshoot and resolve these problems effectively.

Dead Batteries: A Common Culprit

Often, the problem with garage door remotes is simply dead or weak batteries. When your garage door remote suddenly stops working, the first thing to check is the battery. Most garage door remotes use standard coin-cell batteries, typically lasting one to two years. Therefore, replacing the batteries with new ones might quickly resolve your garage door remote issue.

Tackling Garage Door Remote Range Issues

Sometimes, garage door remote range issues occur due to signal interference. Electronic devices like Wi-Fi routers and cordless phones can disrupt the connection between your garage door remote and the garage door openers. As a solution, try relocating these devices or switching to a remote with a different frequency to see if it enhances the performance.

Aligning Remotes and Openers

Misalignment between the garage door remote and the opener can lead to signal issues. Consequently, ensuring proper alignment of the remote and the garage door opener’s antenna is crucial. Adjusting the antenna on the opener’s motor unit and testing the remote can often rectify this garage door remote issue.

Changing Garage Door Opener Codes to Avoid Interference

Garage door remotes operate using unique codes to communicate with the openers. However, interference can arise if nearby garage door openers share the same or a similar code. Changing Garage Door Opener Codes is a straightforward solution. Refer to your opener’s manual and reprogram the remote with a new code to avoid this issue.

Dealing with Obstructed Safety Sensors

The safety sensors on modern garage doors, which prevent the door from closing on obstacles, might malfunction if they are misaligned or obstructed. Therefore, cleaning and aligning these sensors is a vital step in resolving garage door remote issues.

Reprogramming Garage Door Remotes After Power Issues

If your garage door remote has programming issues, perhaps after a battery change or a power outage, Reprogramming Garage Door Remotes is necessary. Your garage door opener’s manual will guide you through this simple reprogramming process.

Addressing Faulty Remote Controls

When all else fails, the garage door remote itself might be faulty. Over time, the internal components can wear out or get damaged. In these cases, purchasing a new remote or contacting the manufacturer is advisable.

Conclusion: When to Consult a Garage Door Technician

While many garage door remote issues are solvable through these troubleshooting steps, some problems might require professional intervention. Regular maintenance, including battery replacement and sensor cleaning, can prevent many common issues. Following this guide, homeowners can ensure their garage door remotes function efficiently, maintaining the intended convenience and security. However, if problems persist, consulting a professional Garage Door Technician is the best course of action to address more complex issues.